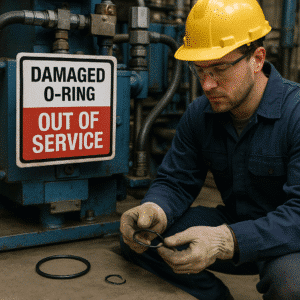
Memasang segel oli secara tidak benar dapat menyebabkan kegagalan dini, kebocoran oli, dan waktu henti yang mahal. Baik Anda mengganti segel poros engkol atau memasang segel poros putar, pemasangan segel oli sangat penting.
In this guide, I’ll show you how to install oil seals the right way—without damaging the lips or misaligning the casing. This article covers tools, step-by-step procedures, lip direction, sealing surface prep, and tips for ensuring long-lasting performance.
What tools are needed for oil seal installation?
Anda tidak memerlukan seluruh lokakarya—tetapi menggunakan peralatan yang tepat akan membuat perbedaan.
| Alat | Fungsi |
|---|---|
| Pemasang Segel Oli / Alat Press | Memberikan tekanan yang merata tanpa merusak segel |
| Palu Karet | Ketuk dengan lembut jika alat pemasang tidak tersedia |
| Pelarut Pembersih | Mempersiapkan permukaan poros untuk penyegelan |
| Pelumas (misalnya oli mesin) | Membantu segel meluncur ke tempatnya |
| Obeng Kepala Pipih / Pick | Lepaskan segel lama dengan hati-hati |
| Mikrometer / Jangka sorong | Memverifikasi kecocokan ukuran poros dan lubang |
Some kits include their own installer. You can also choose a universal press tool when ordering replacement seals like our Segel oli TG4.
What direction should the oil seal face to prevent leaks?
Installing backward is the most common mistake.
- Bibir penyegel utama selalu menghadap sisi cairan atau minyak (ke dalam)
- Bibir debu (jika ada) faces outward, toward contaminants
For skeleton seals like TG4 atau Segel oli TC, inspect the lip curvature: the spring side always faces oil.
How to install an oil seal without leaks: full process
-
Lepaskan segel lama
Use a puller or flat screwdriver. Avoid damaging the housing. -
Clean bore and shaft
Remove oil, dirt, and rust using solvent and lint-free wipes. -
Inspect shaft
Carilah goresan atau lekukan—poleslah dengan lembut bila perlu. -
Lubricate lips
Apply a thin coat of oil or grease—never install dry. -
Sejajarkan segel baru
Center it squarely over the bore opening. -
Tekan atau ketuk secara merata
Use a seal installer or socket. Do not hammer the center. -
Confirm flush seating
Outer edge should be level or slightly recessed—not protruding. -
Double-check orientation
Ensure the spring side faces oil and dust lip faces out.
Working on more complex components? Check our Panduan Penggantian Segel Oli Poros Engkol for deeper instructions.
Can damaged oil seals be reused?
Never reuse old or deformed oil seals—even minor lip damage leads to leaks. Replacement is essential, especially when servicing timing covers or differentials.
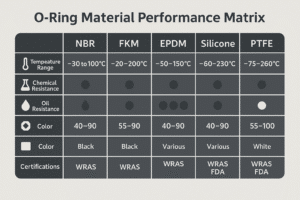
We stock quality replacement seals in NBR and FKM, including OEM types. Explore our TC Dan TG4 pilihan.
Do you need sealant when installing oil seals?
Usually, TIDAK — but exceptions include:
| Kondisi | Sealant Required? |
|---|---|
| Lubang logam halus | ❌ Tidak |
| Worn or oversize housing | ✅ Gunakan Loctite atau sealant flange |
| Static rubber-coated seals (TG4) | ❌ Tidak |
| High-vibration areas | ✅ Light non-hardening sealant on outer edge |
Avoid getting sealant on the lip.
Kesimpulan
Correct oil seal installation ensures leak-free performance and longer service life. Use the right tools, align lips correctly, and never install dry.
Ready for high-quality oil seal replacements?
We offer durable NBR and FKM shaft seals in all sizes. OEM and custom orders supported.
📧 Surel: [email protected]
WhatsApp: +86 17622979498
Related topics
TC Skeleton Oil Seal – Metal Shell
TG4 Double-Lip Rotary Oil Seal
Panduan Penggantian Segel Oli Poros Engkol


